Windows Server How To: Force Redirect to HTTPS in IIS
Forcing IIS to redirect all requests from HTTP to HTTPS is very easy. All you need to do is add the following code to your web.config file (and if it doesn’t exist already, copy the code below in its entirety and open a new file in notepad, paste it in, ‘Save As’ and put web.config in the file name box and select “All Files” for the file type and save it into the root directory of your site (right click on the site you want to redirect in IIS Manager and select ‘Explore’ and save the web.config there). You can also do this via the GUI, both ways of doing it have been listed below:
Please note that URL Rewrite needs to be installed on the server, you can download and install it via the Web Platform Installer on iis.net.
Make sure you don’t have ‘Require SSL’ ticked in the SSL Settings panel. This will completely block all unencrypted requests to the site in question, we want to allow HTTP but redirect them to HTTPS automatically. Having ‘Require SSL’ won’t allow us to do this.
Note: If you wish to redirect all sites on your server, use this guide:
Windows Server How To: Force Redirect all sites on a server to HTTPS in IIS
Option 1) Edit web.config
If you already have a web.config file in your site’s root folder, just copy and paste the bits you need to integrate this into your existing config file. Ensure you copy and paste the opening and closing tags.
<?xml version="1.0" encoding="UTF-8"?>
<configuration>
   <system.webServer>
     <rewrite>
       <rules>
         <rule name="Force HTTPS" enabled="true">
          <match url="(.*)" ignoreCase="false" />
          <conditions>
          <add input="{HTTPS}" pattern="off" />
          </conditions>
          <action type="Redirect" url="https://{HTTP_HOST}/{R:1}" appendQueryString="true" redirectType="Permanent" />
         </rule>
       </rules>
     </rewrite>
   </system.webServer>
</configuration>
Option 2) Do it via GUI
Sensitive data has been blocked out on the screenshots.
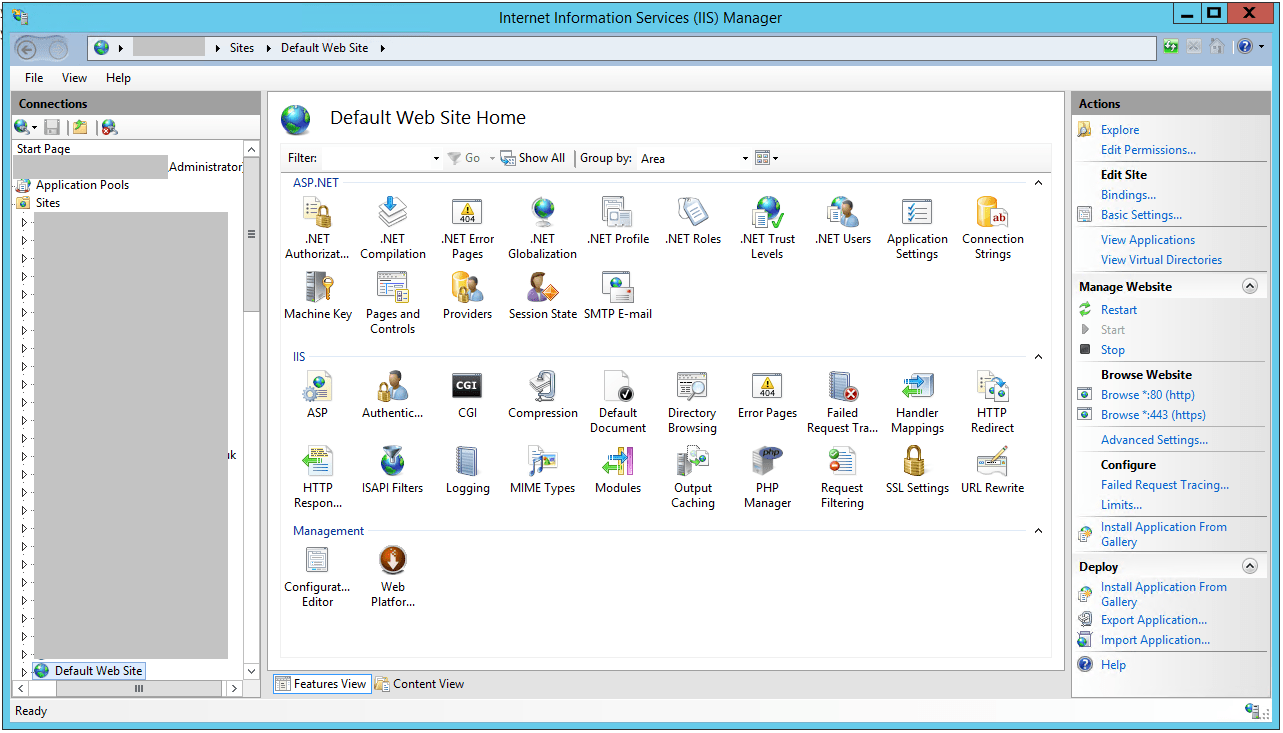
To do this via the GUI, you’ll first need to do is open the . Then, navigate to the website in question using the navigation menus on the left.
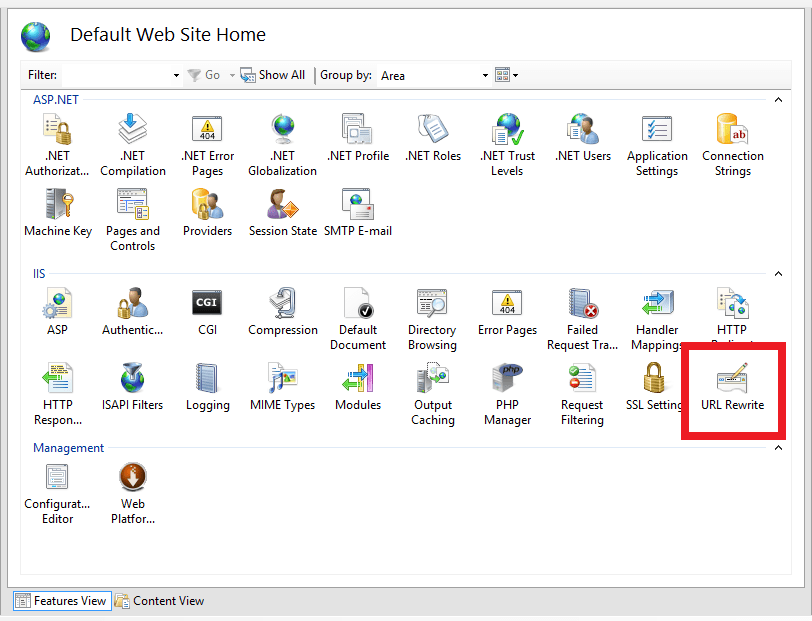
Then, double click on URL Rewrite
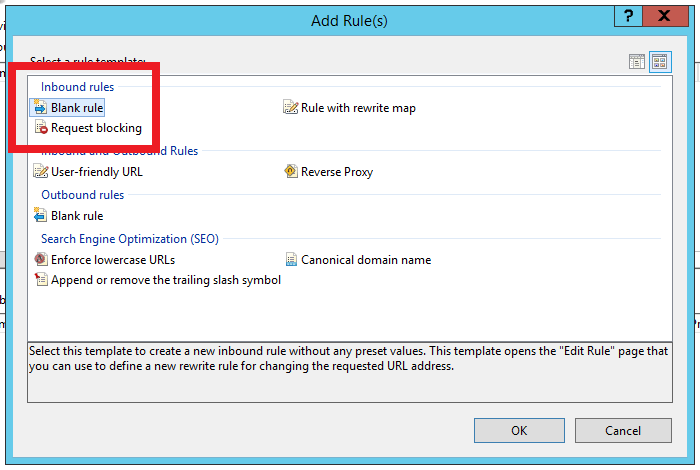
Next up, click on Add Rule(s)… and then double click on Blank Rule under the Inbound Rules section.

Set the name of the rule (I’ve used Force HTTPS), put (.*) into the text-box labelled Pattern:, and untick Ignore case. Then, expand Conditions by clicking the arrow on the right of the Conditions segment and click Add….
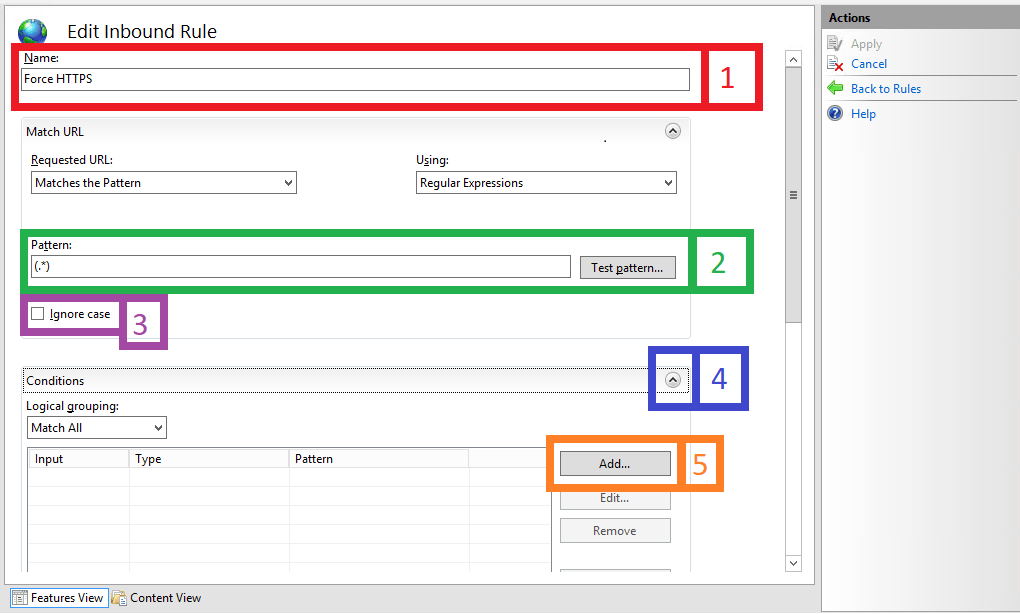
Type {HTTPS} into the text-box labelled Condition input and type off into the text-box labelled Pattern: and click OK.

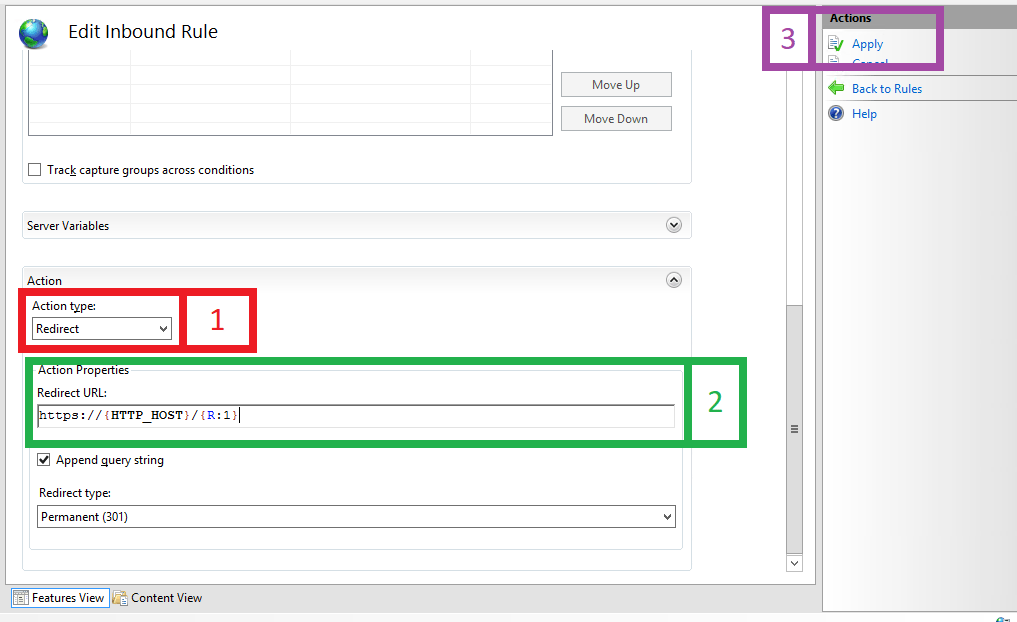
Then, scroll down to the Action section at the bottom and set the Action type: to Redirect and type the following string into the text-box labelled Redirect URL:.
https://{HTTP_HOST}/{R:1}
Ensure the Redirect type: is set to Permanent (301) and then click Apply in the top right of the IIS Manager window.
Now test loading the website you just configured HTTPS redirection for in a web browser by browsing to it with http:// at the beginning of the URL, and IIS will automatically redirect the site to the HTTPS version.
Notes:
Updated: 2017.08.21 to include GUI steps.