Windows Server How To – Use Windows Defender with hMailServer
hMailServer naively supports using ClamAV (provided you have it installed), but ClamAV arguably isn’t the most effective antivirus available. Since Windows Server 2016 comes with Windows Defender built in, you can use Windows Defender as a third-party virus scanner instead of purchasing something else. It’s all very easy to configure too.
1) Pre-configure Windows Defender
The first thing to do is to configure Windows Defender to not scan some key hMailServer folders. While this may sound counter-intuitive, it’s actually vital because we don’t want Windows Defender removing infected files before hMailServer can ask it to scan it manually because this will result in emails just disappearing with no notice.
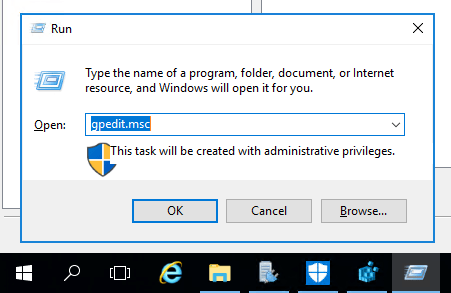
To add the exclusions, you’ll need to tweak some Group Policy settings. To do this, press Start + R to open the Run window, enter gpedit.msc into the text box, and press OK.
Then navigate to Computer configuration > Administrative templates > Windows components > Windows Defender > Exclusions and then double click on Path Exclusions.

Set the option to Enabled, and then click Show… next to Path Exclusions.
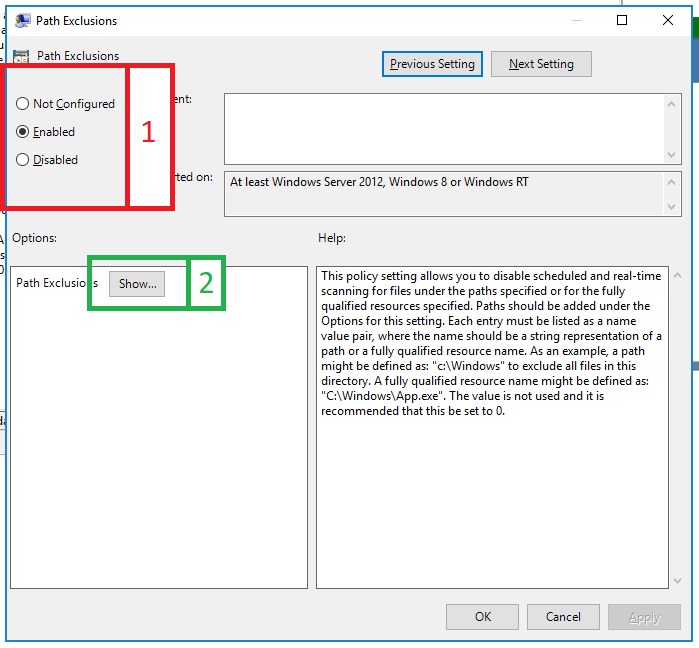
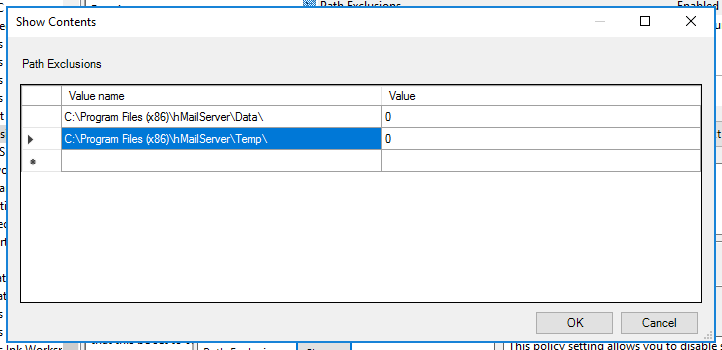
Next, you’ll need to add the exclusions. To add each of them, double click on the blank text box on the left (under Value name) and enter the following and press enter:
C:\Program Files (x86)\hMailServer\Data\
Double click the blank box to the right of the location you just typed in (under Value) and type 0 (as in zero, not the letter):
Repeat the above process with the following location and click Ok.
C:\Program Files (x86)\hMailServer\Temp\
2) Configure hMailServer
Next up, you’ll need to configure hMailServer to use Windows Defender to scan emails.
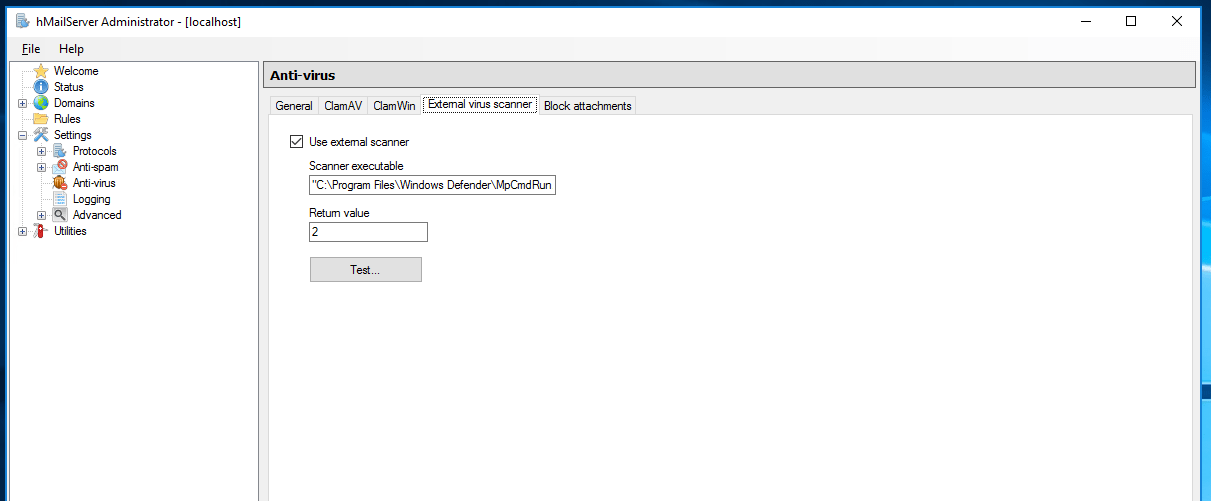
To do that, open up hMailServer’s administrative console and head to Settings > Anti-virus. Then, click on the External virus scanner tab.
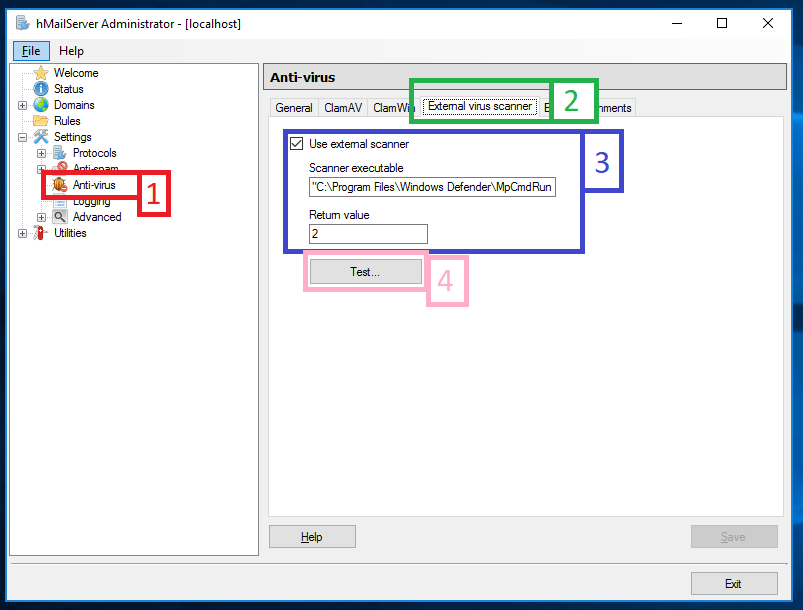
Make sure the tickbox next to Use external scanner is enabled, and then enter the following into the Scanner executable text box and set the Return value to 2
"C:\Program Files\Windows Defender\MpCmdRun.exe" -scan -scantype 3 -file "%FILE%" -disableremediation"
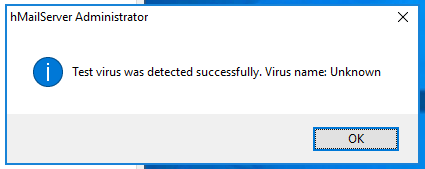
Then, click Test… and the following message should pop up:
3) Final configuration
hMailServer is now configured to use Windows Defender for antivirus when it processes emails. If you head back to Settings > Anti-virus (General tab), you can then manage what hMailServer should do with infected emails. I’ve configured it to simply delete the emails, but you can configure it to delete the emails and notify sender or recipient, or just delete the attachment.