In this guide, we will be creating a guest WLAN/WiFi network and isolate it from your existing network by creating a guest VLAN and putting all devices on this VLAN on a operate subnet. This can be scaled to create numerous VLANs but we’ll just be creating two (your own network, and a guest network).
We’ll be using LAN1 for your internal network, and LAN2 for your guest network. If your router has WiFi enabled, we’ll also be using SSID1 for the internal network and SSID2 for the guest network. This can be tweaked but make sure you do it properly.
1. Configure VLAN Tagging
The first step here is to create the new VLAN Tag on your central router. To do this, head to VLAN (LAN > VLAN).
Ensure Enable is ticked in the top left, and then enter the following details:
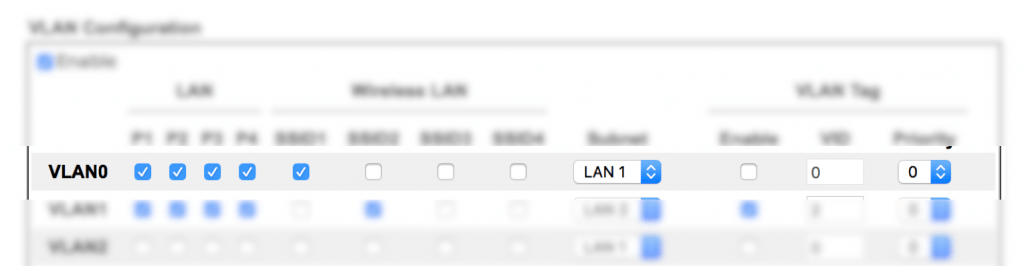
VLAN0: tick all of the ports on the LAN segment (for my router, there are only 4 ports so P1 though 4 are all ticked – a Vigor 2925 for example will have 5 though – tick all of them). If your router does WiFi, tick SSID1. Then select LAN1 from the Subnet dropdown menu. For the VLAN Tag section, make sure Enable is unticked and VID is set to 0.
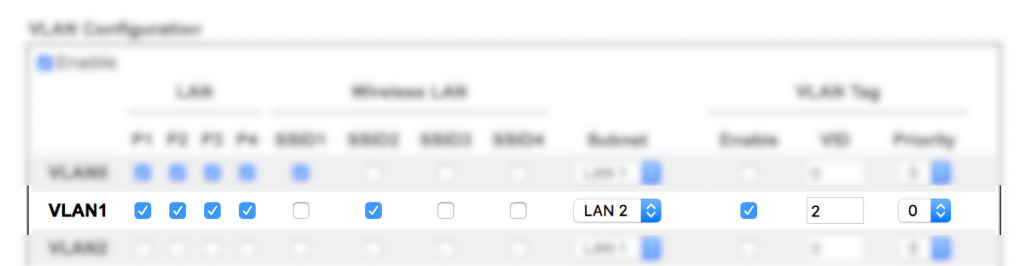
VLAN1: As before, tick all of the ports on the LAN segment. If your router does WiFi, tick SSID2. Then select LAN2 from the Subnet dropdown menu. For the VLAN Tag section, make sure Enable is ticked and VID is set to 2.
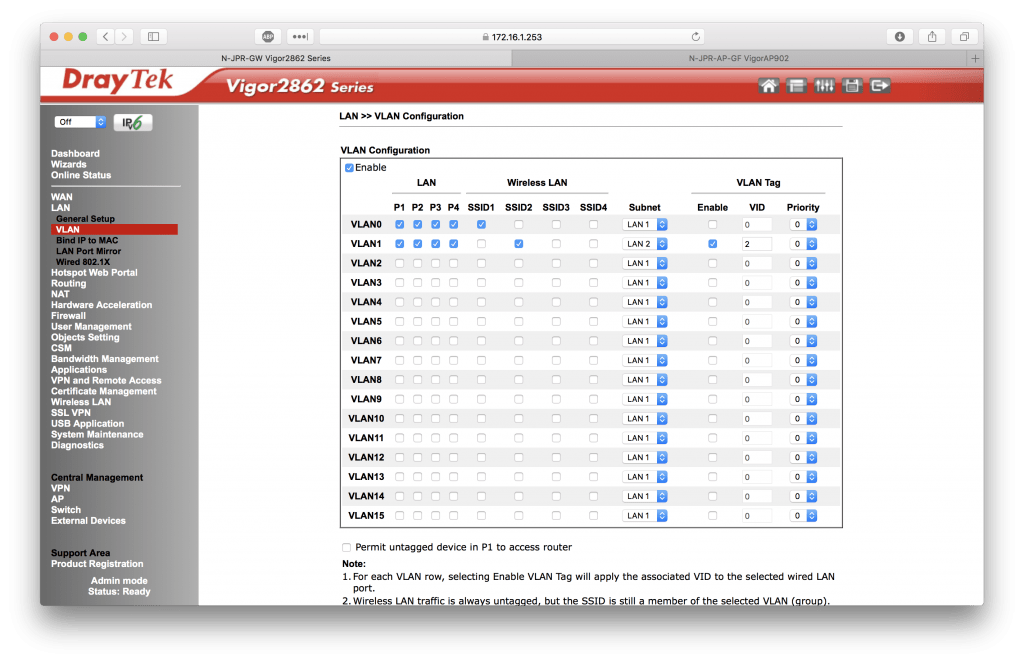
Scroll down and click OK and reboot the router.
2. Configure LAN2
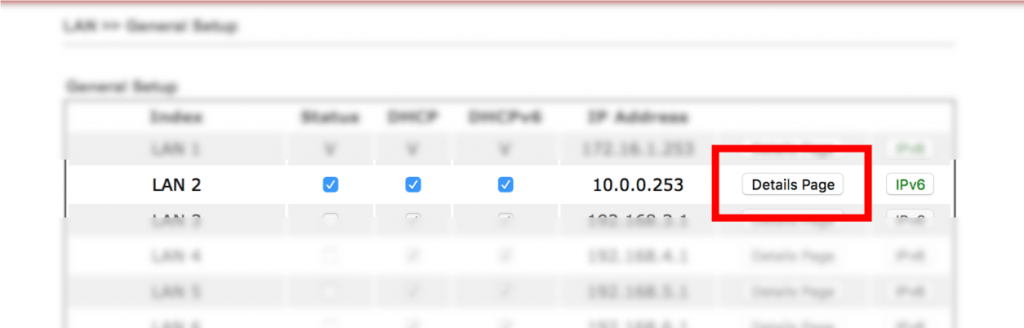
The next step is to configure LAN2 to your needs. head to General Setup (LAN > General Setup) and click on Details Page on the LAN 2 row.
Enter the following details (if you tweak them, make sure you use a different IP range to your other LANs.
Network Configuration:
Enable: Selected
For NAT Usage: Selected
IP Address: enter an IP for your DrayTek router on this LAN – I’m using 10.0.0.253
Subnet Mask: 255.255.255.0 (tweak if needed)
DHCP Server Configuration:
Enable Server: Selected
Start IP Address: 10.0.0.50 (tweak if needed)
IP Pool Counts: 100 (tweak if needed)
Gateway IP Address: Make this the same as the IP address you set earlier (again, I’ve used 10.0.0.253)
Click OK and reboot your router.
3. Wireless Configuration
If you use the built in WiFi on your DrayTek router, follow step 3a. For DrayTek VigorAPs (such as the VigorAP 902), follow step 3b. You can also push these settings out via an AP Profile if you push config out to your DrayTek VigorAPs by just associating the correct VLAN tag in the SSID configurations during the profile wizard (read the steps on 3b to know what to enter and which boxes to tick if you’re unsure).
For other access point brands, follow their own documentation – this guide is only for DrayTek gear.
3a. Built in wireless on DrayTek Router
The DrayTek router will use the settings configured in the VLAN section for defining which VLAN tag each SSID will use, so tweak the configuration below if you associated different a different SSID for the guest VLAN tag. Repeat these steps if your DrayTek router supports 5GHz networks too if needed.
Head to General Setting IEEE 802.11 (Wireless LAN > General Setup) and ensure Enable Wireless LAN is ticked.
For SSID 1 set the SSID name and make sure Isolate Member and Isolate VPN are both unticked.
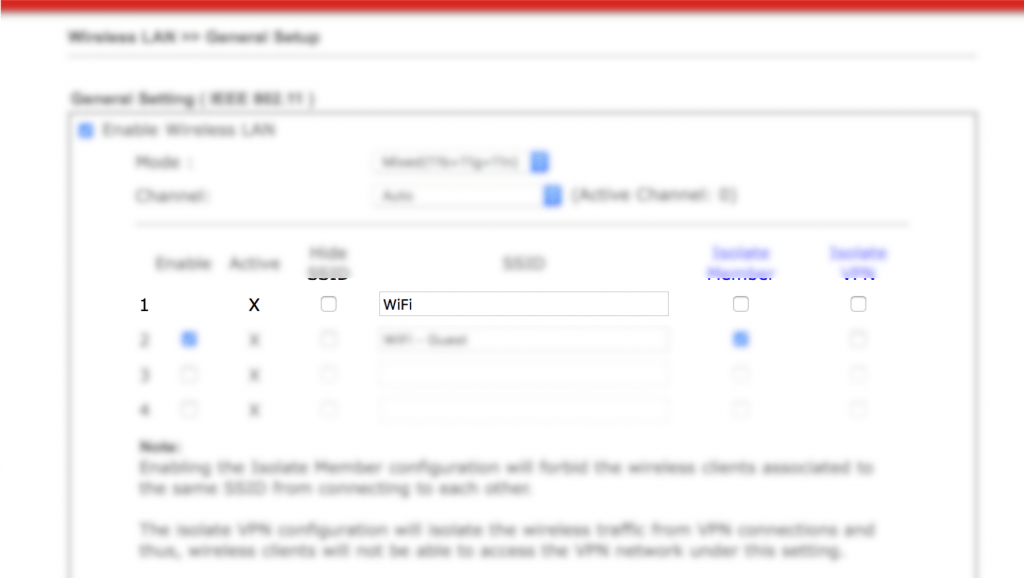
Then for SSID2, tick Enable and enter the network name and tick Isolate Member.
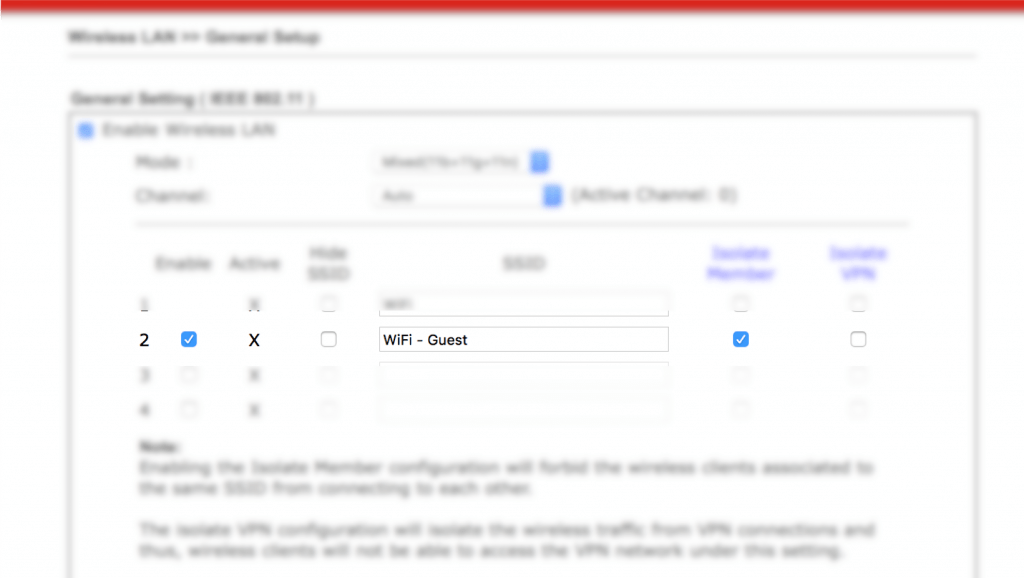
Click OK.
You’ll need to configure security and WiFi network passwords separately.
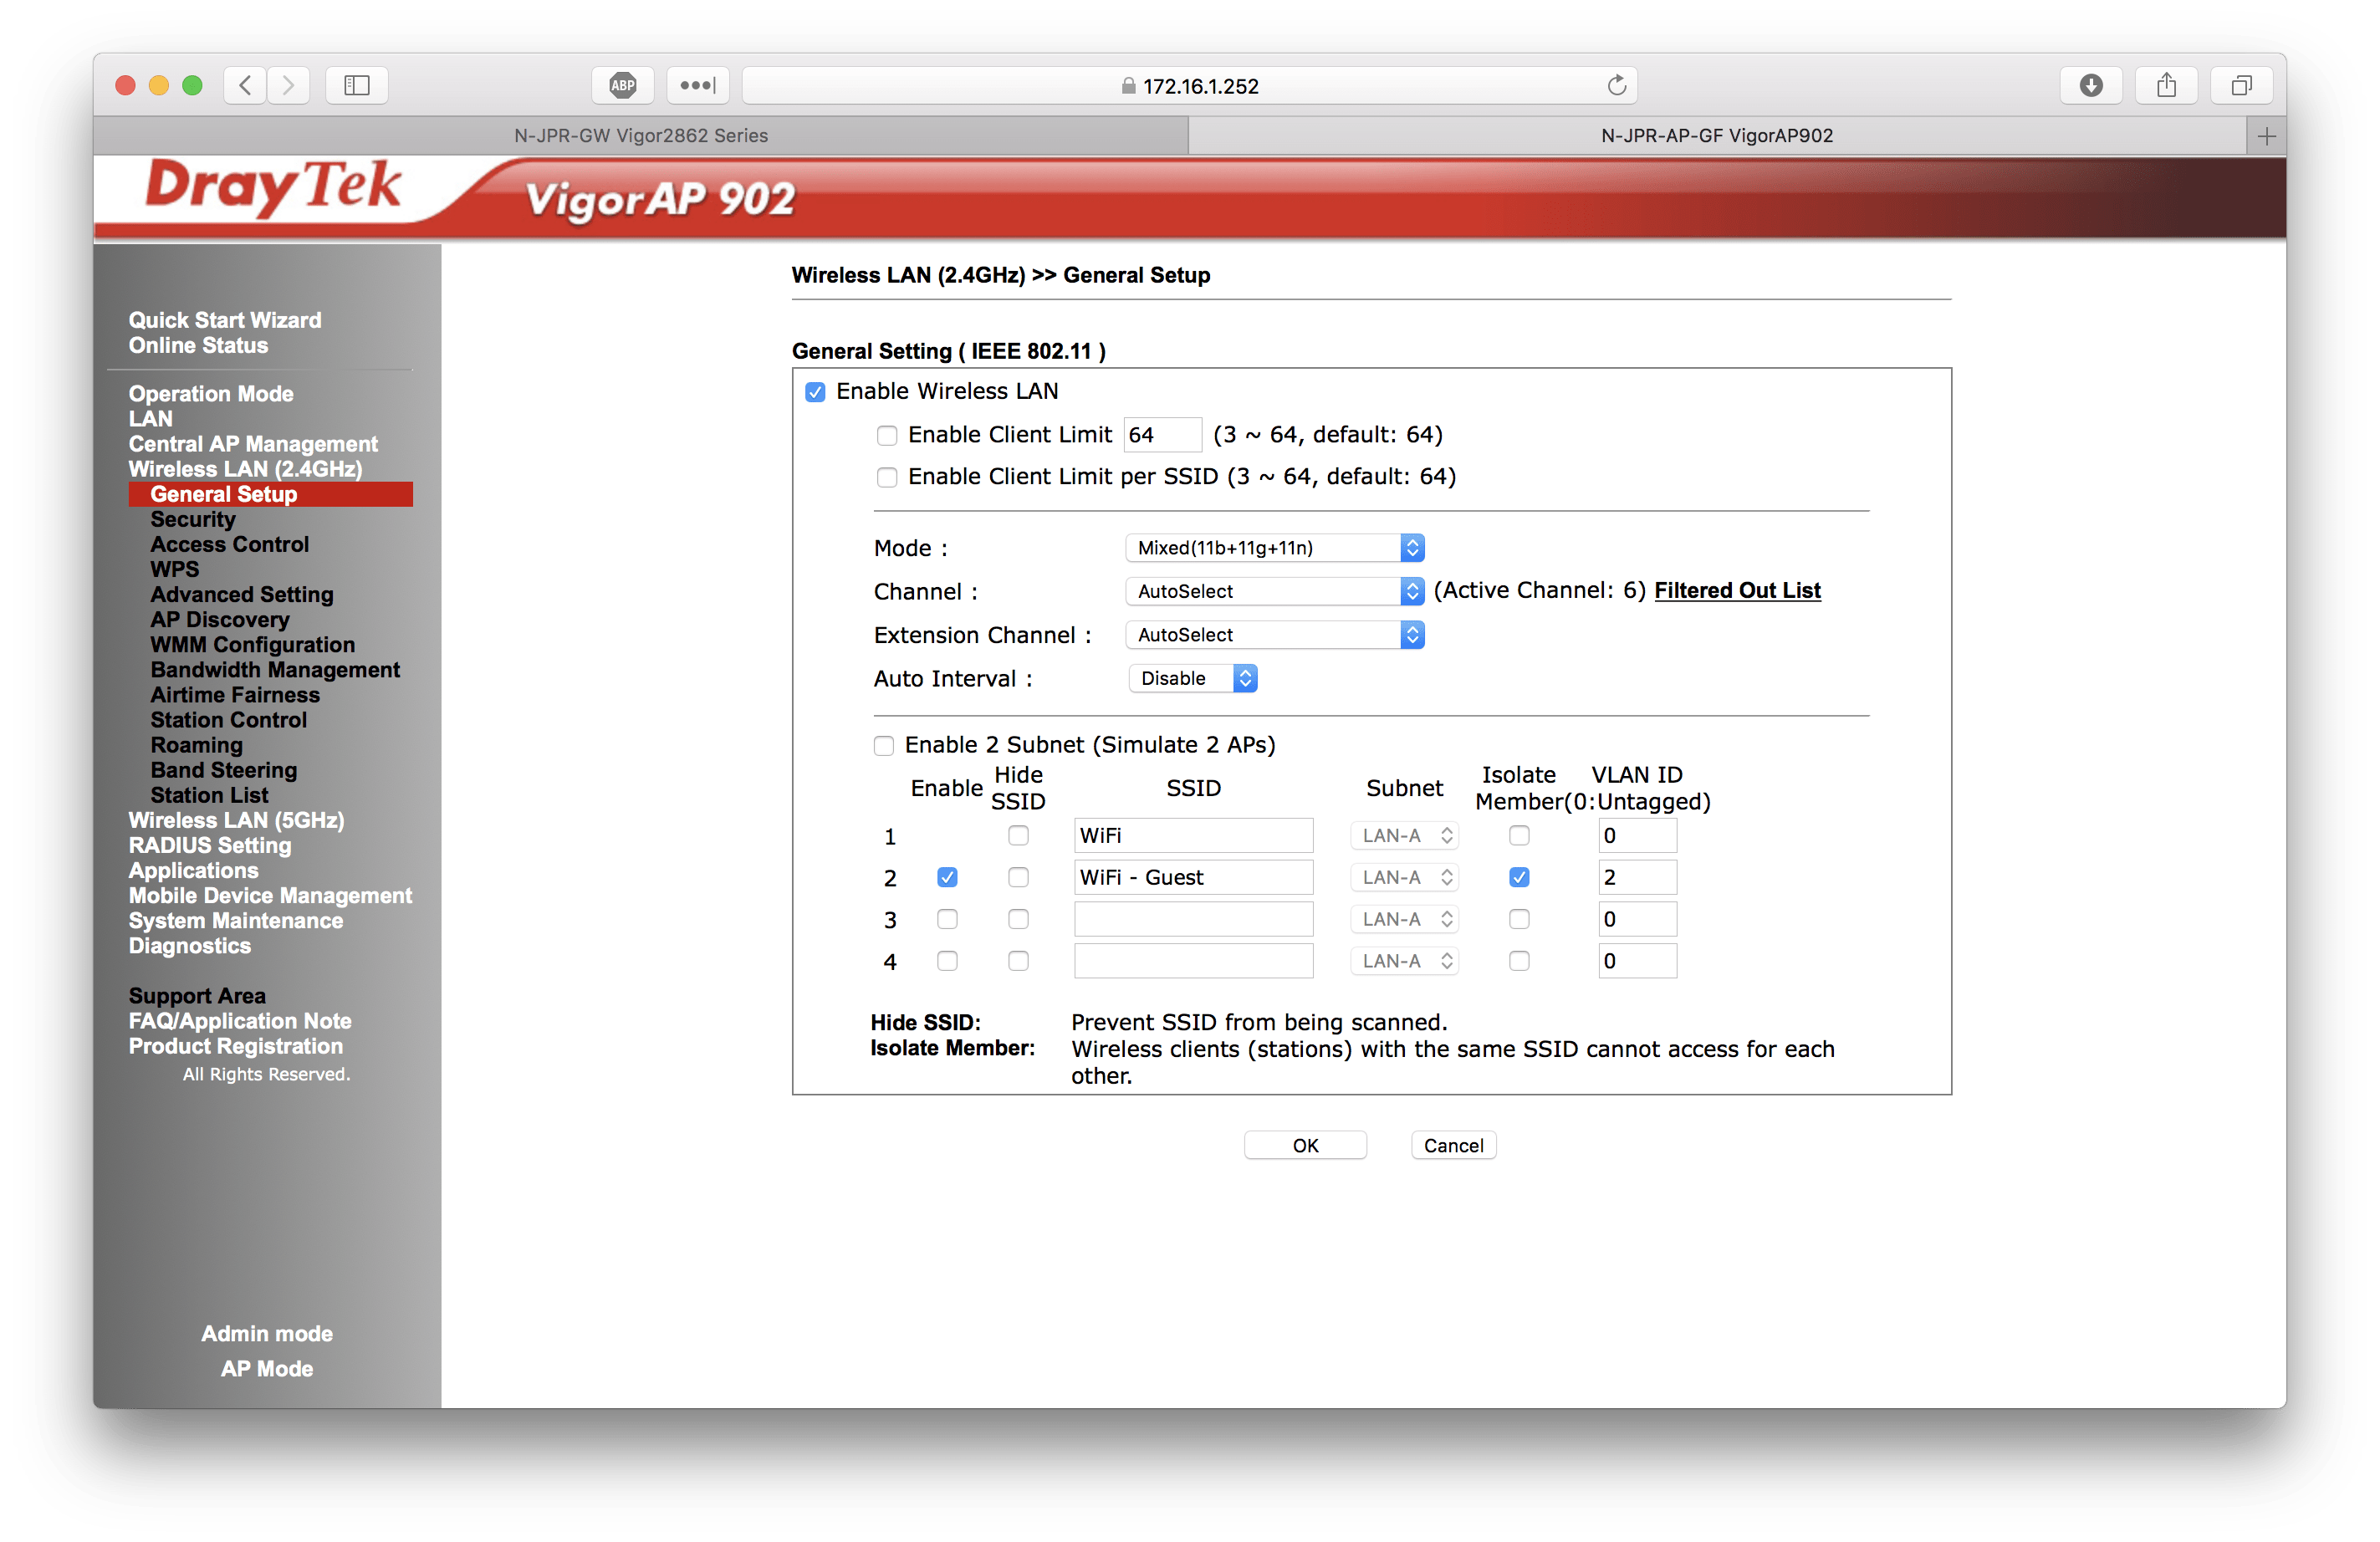
3b. DrayTek VigorAPs
Ensure your DrayTek Vigor AP is plugged into your network and head to its user interface. Then head to the Wireless LAN config settings (Wireless LAN 2.4GHz > General Setup) – my guest network is only on the 2.4GHz spectrum as I want 5GHz to be only for the internal network but tweak/repeat if you want to have the guest network be on both spectrums or just 5GHz (all this depends on whether your AP supports this).
Make sure Enable Wireless LAN is ticked.
For SSID1, enter the SSID name and make sure Isolate Member is unticked if necessary and leave VLAN ID as 0 (untagged).
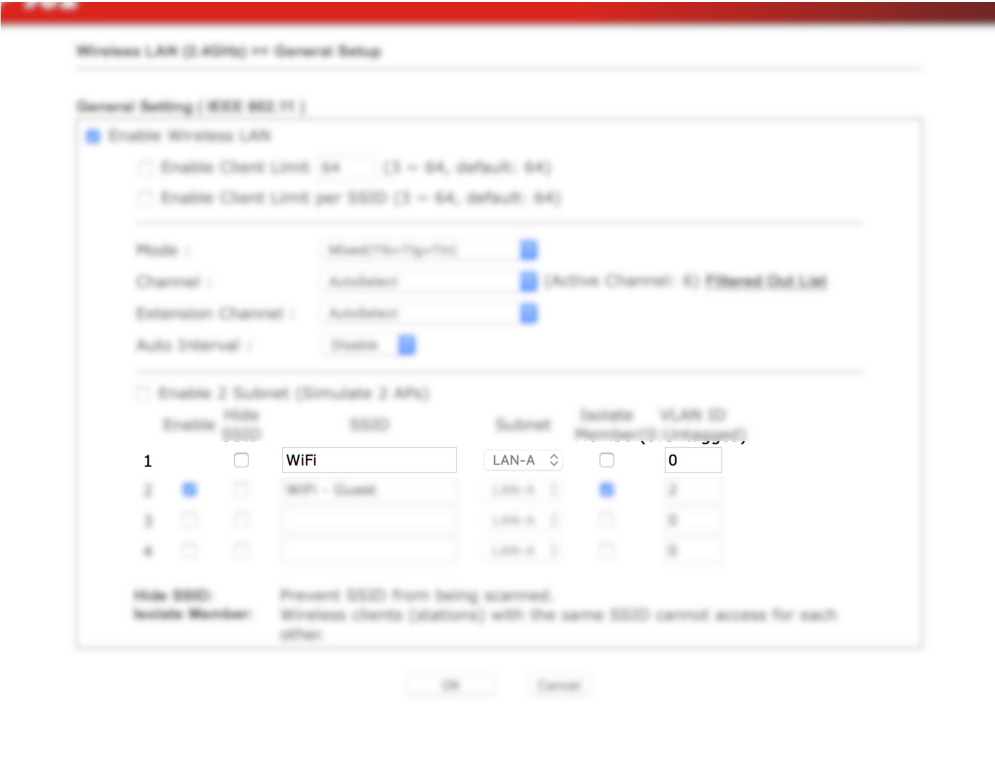
For SSID2, make sure Enable is ticked and enter the SSID. Then, tick Isolate Member and enter 2 in the VLAN Tag box.

Click OK.
You’ll need to configure the password separately under the Security section of each Wireless LAN section (if your router supports 2.4GHz and 5GHz).
All done! Test connecting to your guest WiFi network, and check you have been given an IP address from the LAN2 subnet.